

28 Feb Old Glory Bottle Cap Flag Art in Progress: February 22-28
Marcie videotaped the first cap being nailed to the flag. Only 19,999 or so to go!

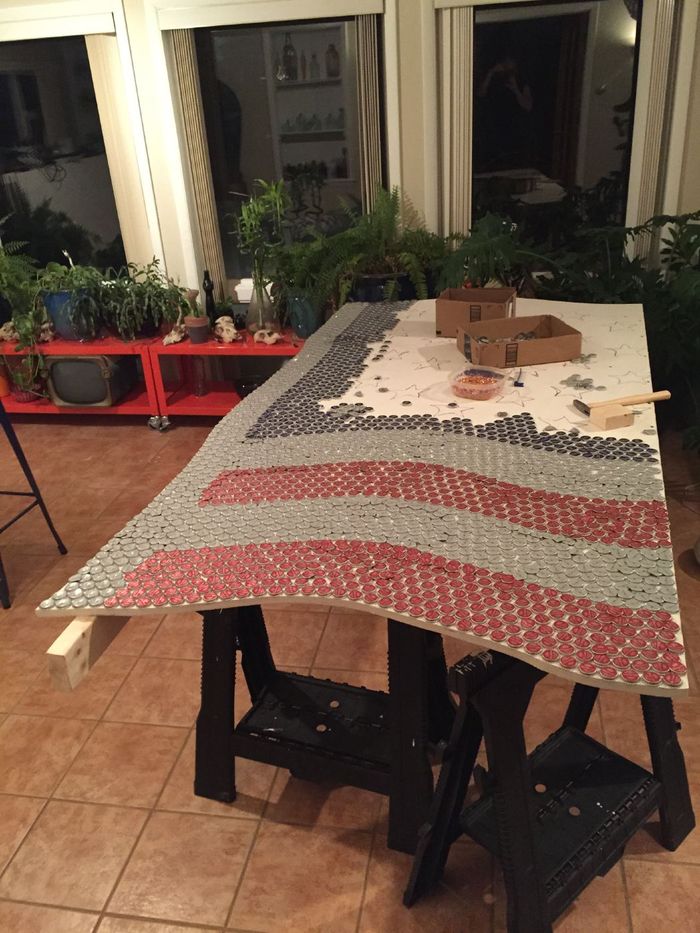
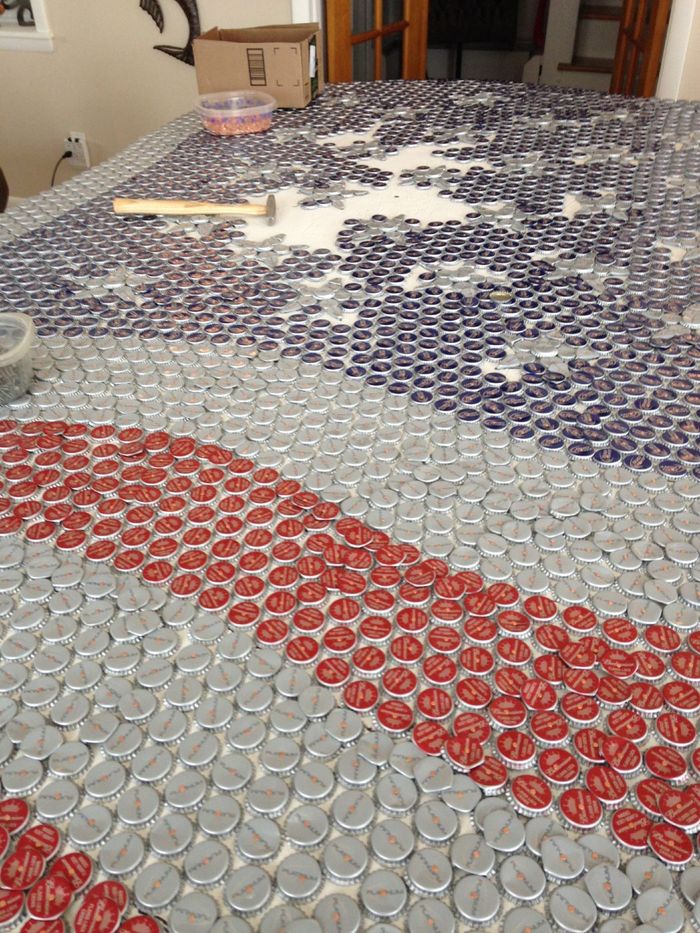
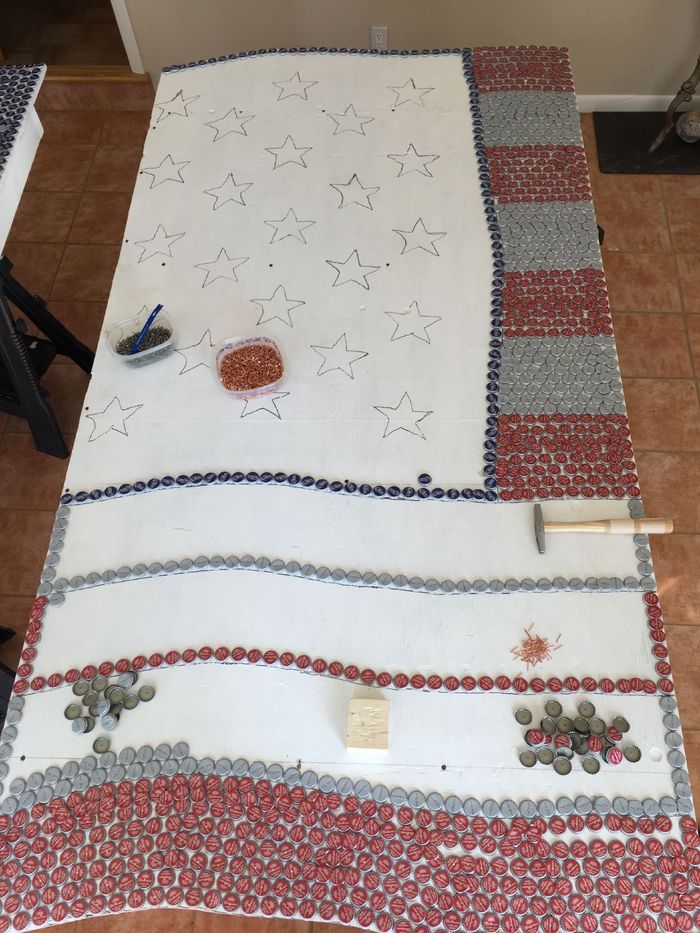
The first couple rows of caps have been applied. Usually, I partially crimp all the caps so that they overlap and have no space at all between them. Because this piece is so huge, 10 feet tall by 16 feet wide, I felt that I could allow minimum spaces by staggering each row. Like pixels, or pointillism, the colors will read fine from a reasonable viewing distance. Staggering each row allows the caps to be as close as possible without overlapping each one.
The curves in the design cause the caps not to mesh up quite as perfectly as I’d like, so in those areas I’ll crimp the caps with the hammer and overlap any spaces that are too large.
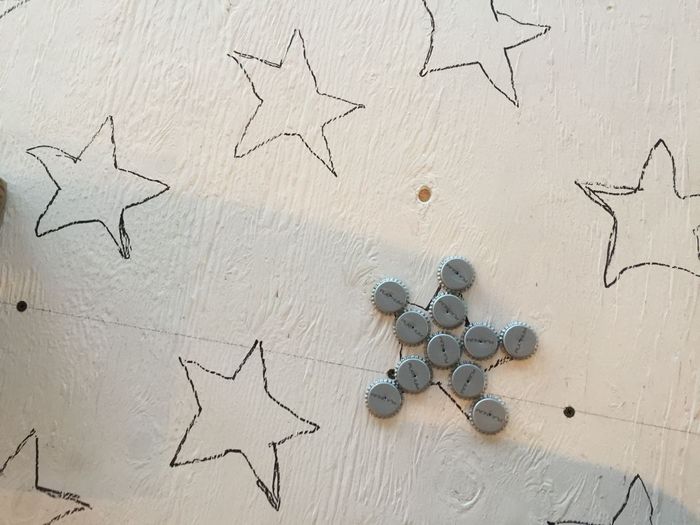
I knew that the stars would be the most difficult part of the piece… even though the flag itself is huge, the stars are still small enough to be difficult to render in detail. This photo shows how they would have looked without significant crimping and modification. This approach looked too much like a snowflake for me so I knew I’d have to find a better way. I also knew that the stars would throw off the rows of caps enough that it would require a lot of fill in caps lapped over the basic field of blue.
Here, the stripes are finished on the first panel and I’ve started filling in the blue. As much as possible, I tried to do large areas staggered in rows to minimize the areas that would need extra fill.
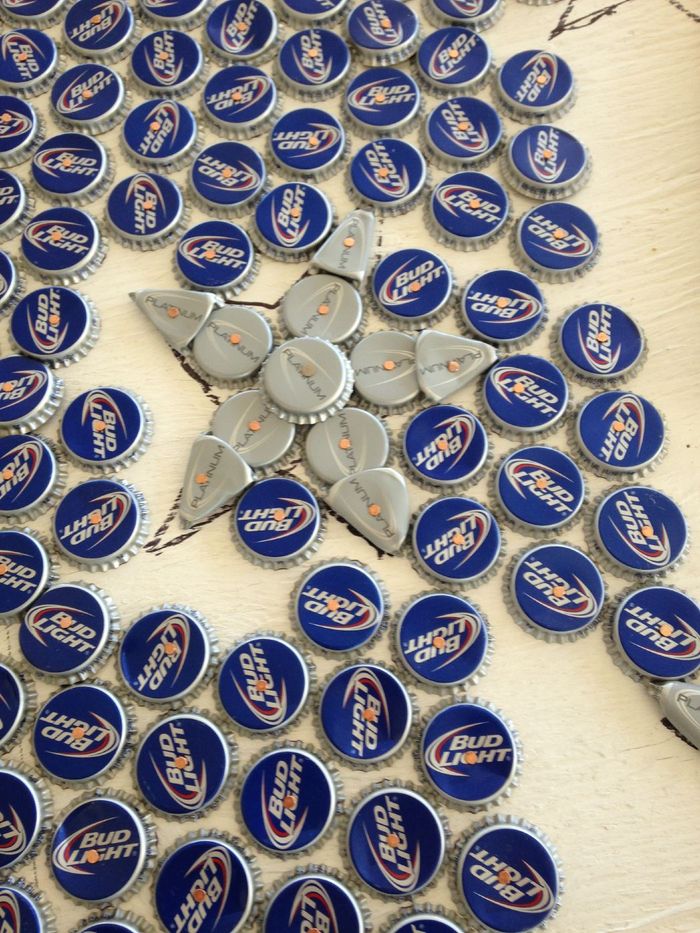
This is how I eventually decided to do the stars— Start with five caps organized into a tight pentagon and then extend the point with a cap bent into a triangle. I used a US nickel as a spacer when laying out the pentagon (if you use a bottle cap, you’ll end up with a nice tight hexagon) and then covered the center with a cap that was raised above the others. Those got a longer, stainless steel nail instead of the copper plated nails used everywhere else. The raised cap on top gave the stars a nice prominence that helped them stand out in the field of blue. Note that on most of the stars, the swoop of the logo is oriented to the point of the star.
I tried build a jig out of plywood to bend the caps into the point shapes but ultimately it had to be done by bending the caps by hand in my fingers. By the end of the fifty stars, both hands had serious callouses and lacerations.
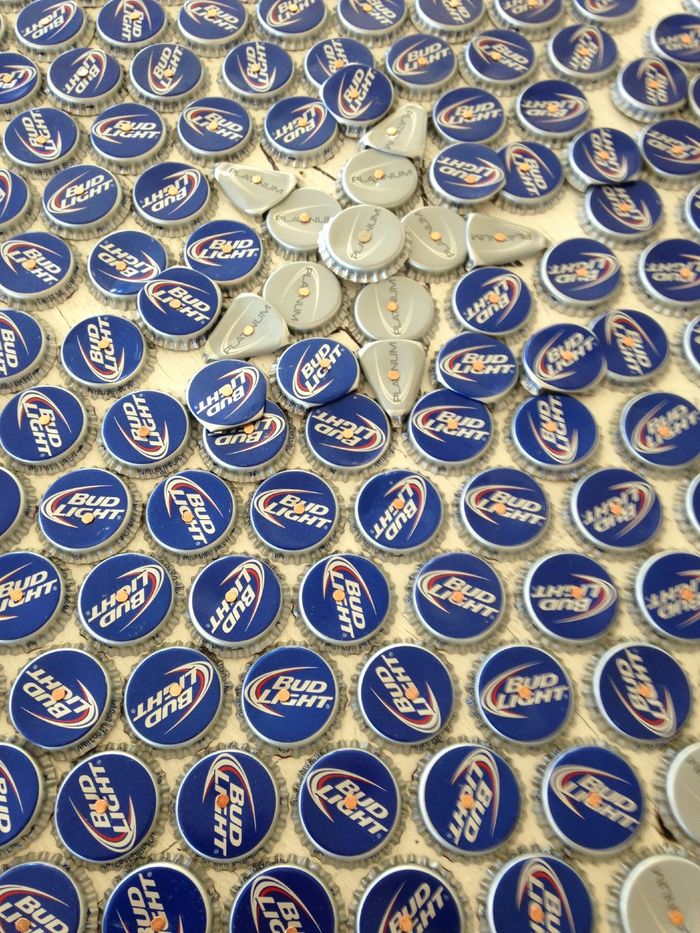
As predicted, because the stars were irregular to the rest of the piece, they left a lot of areas that required overlapping the caps to fill in the color around them. Overall, that was the most difficult and time consuming part of the project.
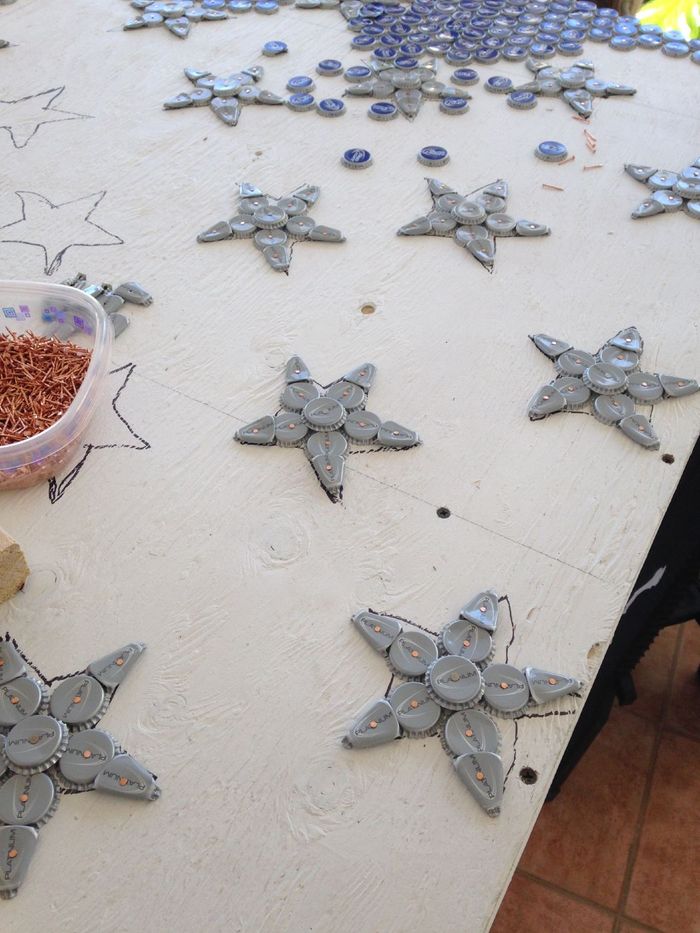
I made all the stars first, and then filled in around them as efficiently as I could.
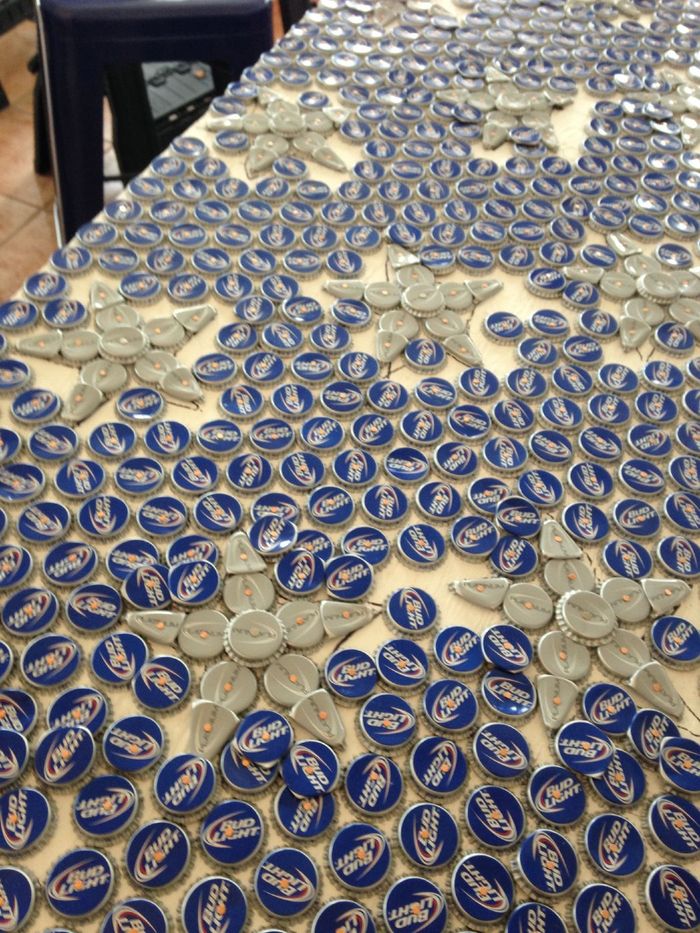
Here you can see how most of the blue field can be staggered caps, and how much space around the stars will require customized fill caps.
Almost done with the first panel!
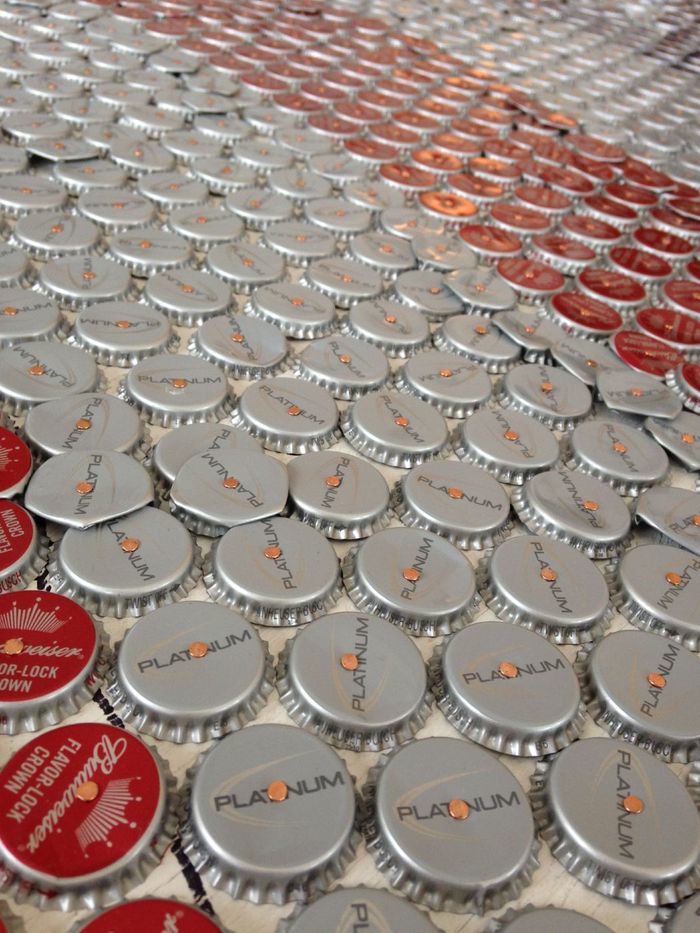
A close up of the stripes. You can see a few filler caps crimped and laid over the top the rows, but not all that many… I count ten in the silver row in the photo above.

Because the flag took up the whole room and the ceiling is kind of low it was very difficult to stand back far enough to decide whether a space between caps was too wide. The best thing to do was to circle the panel and look at it from all angles. When finishing the blue area on this panel, I’d use red caps to cover any area I felt needed more fill (just as a place marker so I didn’t lose the spot). After filling all those spaces, I’d repeat the process until satisfied that the color was solid enough.
Here’s panel two with most of the stripes filled in. In order to get nice staggered rows and minimize the areas that needed fill, I decided to lay out the edges of each strip first, then work inwards from both sides so that most of the overlapping caps would land in the middle. That made it much easier to work a bit faster and to get cleaner fields of color.
You can see almost all the tools used in this photo— a tack hammer, a wooden block used as an anvil to smash the edges of the caps for overlay and a little pry bar. I also used needle nose pliers to pull nails on occasion if I wasn’t happy with the placement of a cap. I saved all the bent nails because it was easier to count the nails used than the caps. By the time I was done, only 90 nails had been pulled and 76 caps rejected because they bent or smashed wrong. Out of 20,000 plus bottle caps used that’s a pretty amazing accuracy rate!
I did some napkin math about midway through the project and my guess is that I swung that little tack hammer (punching, nailing and crimping) about 300,000 times on this project! Maybe even more.
Follow the creation of Old Glory from start to finish—
- The Making of Old Glory, Part One: February 12-21
- The Making of Old Glory, Part Two: February 22-28
- The Making of Old Glory, Part Three: March 4-8
- The Making of Old Glory, Part Four: March 9-12
- The Making of Old Glory, Part Five: March 18-21
- The Making of Old Glory, Part Six: March 22-28
- The Making of Old Glory, Part Seven: April 4-17
- The Making of Old Glory, Part Eight: Stagecoach Festival Setup
- The Making of Old Glory, Part Nine: Old Glory on View at Stagecoach Festival
- The Making of Old Glory, Part Ten: The Documentary