

16 Mar La Siren III, a Commission for American Museum of Natural History
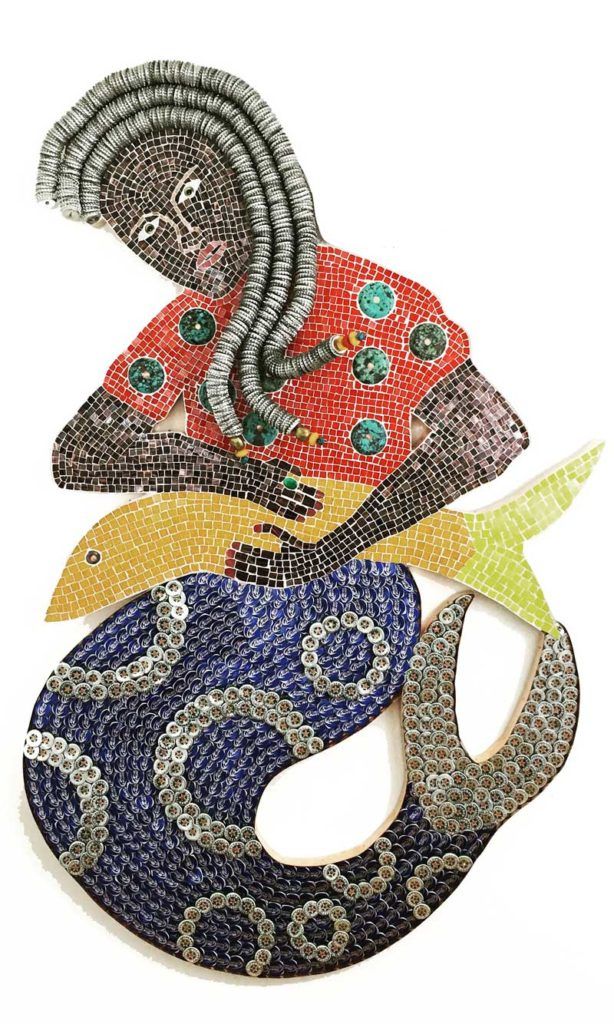
La Siren III, 2017
Vitreous glass, bottle caps, stone, copper, 15.65 carat emerald, glass eyes, plywood and Hardiebacker substrate
60″ H x 36″ W x 1.5″ D
Commissioned by the American Museum of Natural History
La Siren III was commissioned by the American Museum of Natural History for the traveling exhibition Mythic Creatures: Dragons, Unicorns & Mermaids. I’m told it’s one of the most popular exhibits the museum has ever toured.
Current Exhibition Dates (more TBD):
Turtle Bay Exploration Park, Redding, CA: May 27, 2017 to September 10, 2017
Grand Rapids Public Museum, Grand Rapids, MI: November 11, 2017 to May 20, 2018
Peoria Riverfront Museum, Peoria, IL, June 23, 2018 to September 30, 2018
The commission came about when Kate Reutershan reached out to license an image of my earlier mosaic La Siren II for the book, Mythic creatures: and the impossibly real animals who inspired them. I offered to create a similar piece for the show and the museum was delighted to accept. I was given leeway to change elements of the design so that the sculpture wouldn’t be an exact replica which gave me the opportunity to try some new things. Probably the most exciting change was embedding a real 15.65 carat emerald into the mosaic! I kind of think I may included large gems in all future glass mosaics from now on.
Below are some photos of the work in progress, details about the design choices and process and some detail images that show elements I’m particularly fond of.
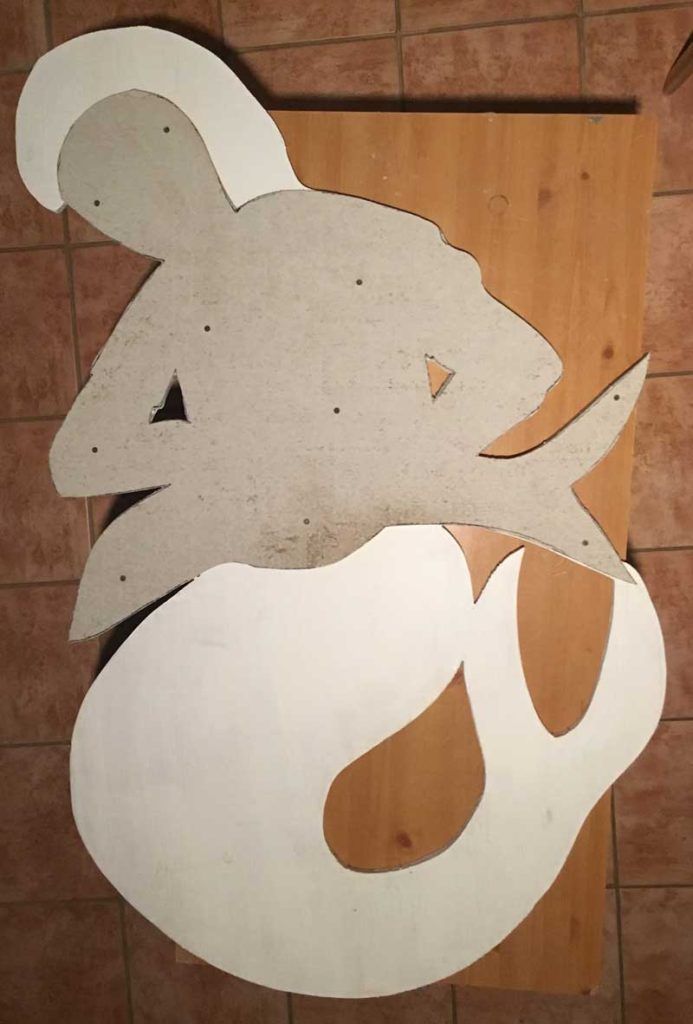
Step one— the substrate.
On hybrid mosaics that use both glass and bottle caps, the substrate needs to be both plywood and cement board (or Hardibacker tile board which I prefer). The glass can’t be adhered directly to plywood and the caps can’t be nailed on through the cement board. The bonus feature of this layered approach is that the final surface of the mosaic can be very flat— because the caps are much thicker than the glass, having them recessed below the Hardibacker brings them to the same level as the glass.
The plywood is primed with two coats of Kilz before attaching the cement board with screws that will be covered over by the glass tile.

Here’s a photo of (almost) all the tools used. The various nails, punches and wood scraps are used for shaping bottle caps in tight corners like the mermaid’s tail, and also for shaping the copper band that protects and decorates the mosaic’s edge.
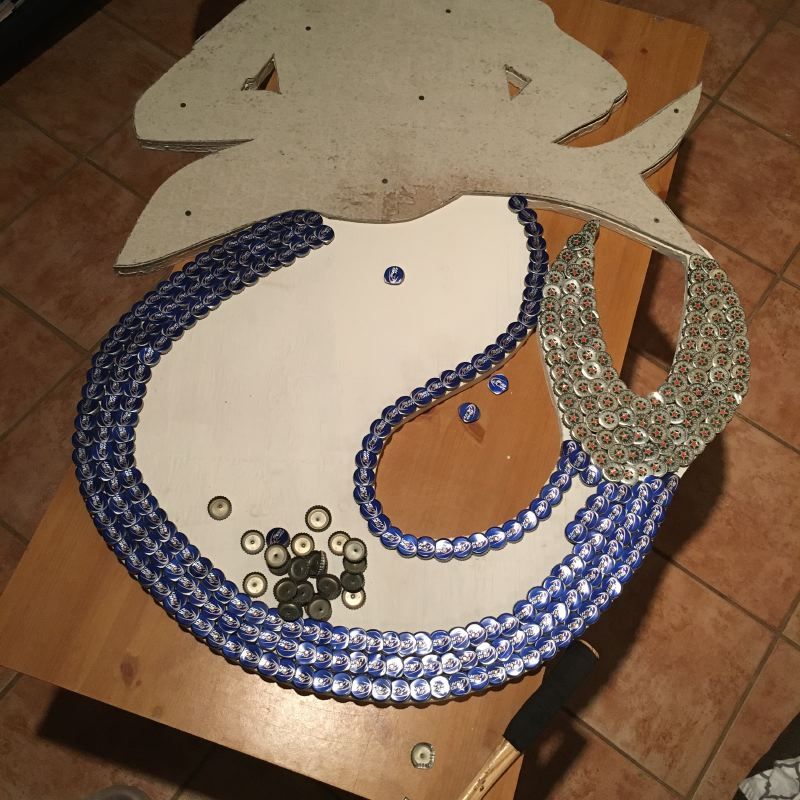
Day One of Applying the Caps—
I did the tail differently than the original, while keeping the same color scheme.
On the first mosaic, the tail is a mix of different brands of blue caps which gives it a very folk art, patchwork quilt kind of look that I really love. It feels very in keeping with the subject matter of La Siren. Also, the circles of silver caps are worked into the original at the same level as the blue caps. But with the chance to make a new version I wanted to try something a bit different based on some tricks I discovered when building the American Glory mosaic for Budweiser.
When I made the first La Siren, I used bottle caps for the tail both to emulate the sequins used in Haitian ritual flags, and because the caps overlapped like the scales of a fish or mermaid. In this mosaic, I decided to orient the swooping Bud Light logo so that it accentuated the look of scales. The caps are applied starting at the very end of the tail and working up to the waist in rows. In order to keep the lines as seemly as possible, I worked in from the edges on both sides— so the last caps applied are those at top middle, right below the hands. This is a very tricky technique to pull off, because each cap has to be partially flattened to overlap the ones next to it and that is done by hitting the cap with a tack hammer with the face down. You have to be very careful to orient the cap correctly to get the desired crimp. Also, the caps on each side of the tail are flattened on opposite sides. So there’s a lot of room for dyslexic type mistakes to be made.
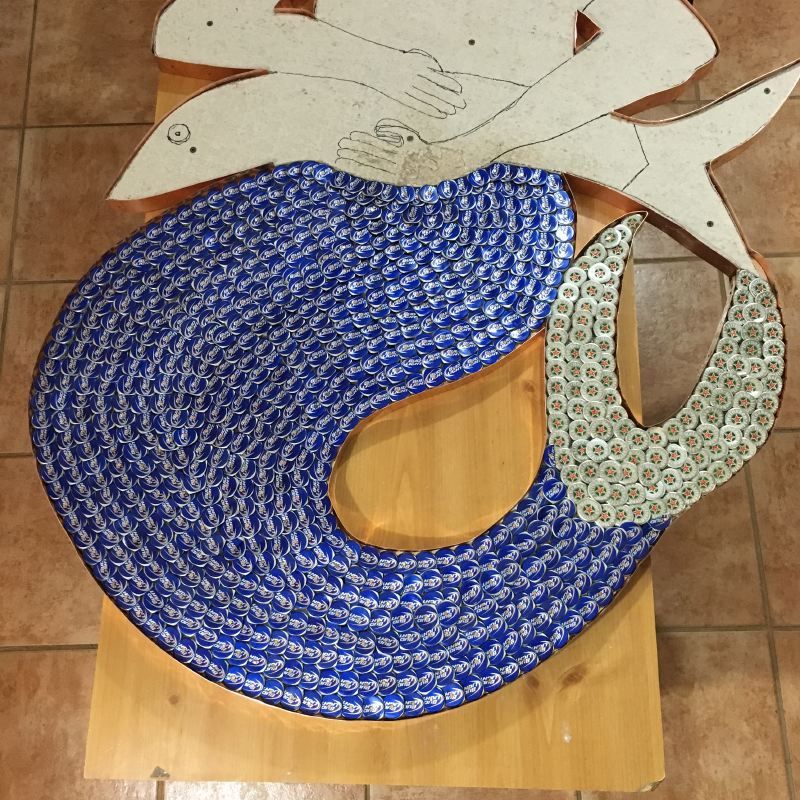
One of the happy accidents that came about as a result of this method is that there’s kind of a raised, triangular area right where the mermaid’s crotch should be which feels very anatomically correct to me. It’s not pornographic and in fact it’s pretty subtle, but you’ll definitely see it if you look for it.
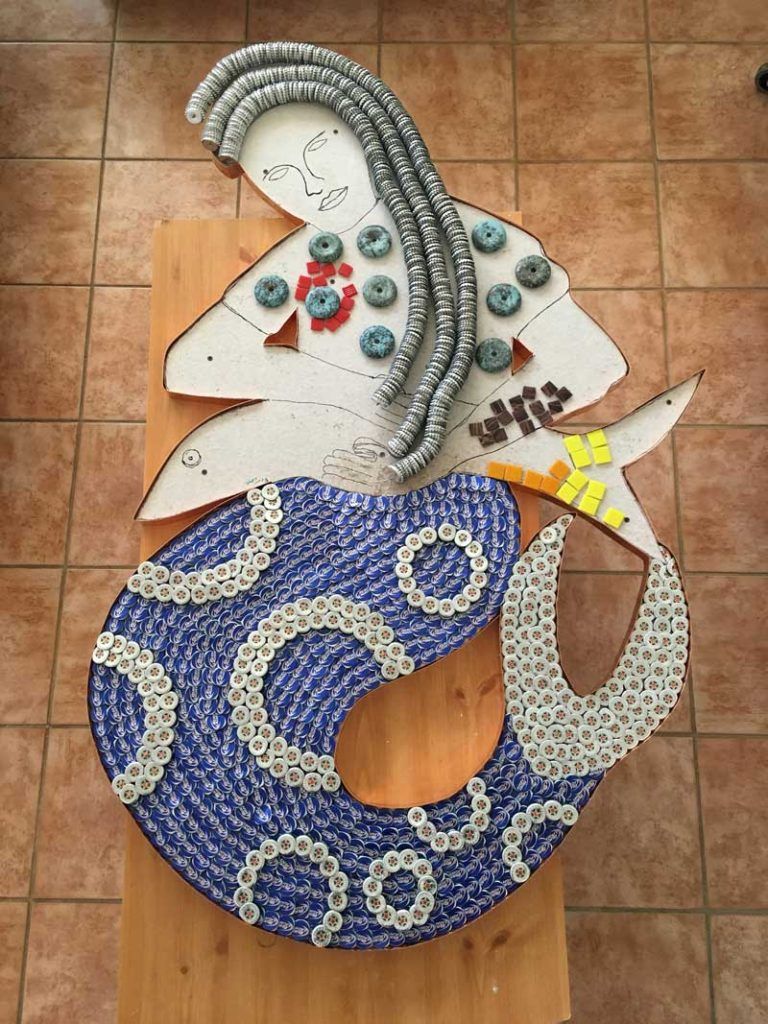
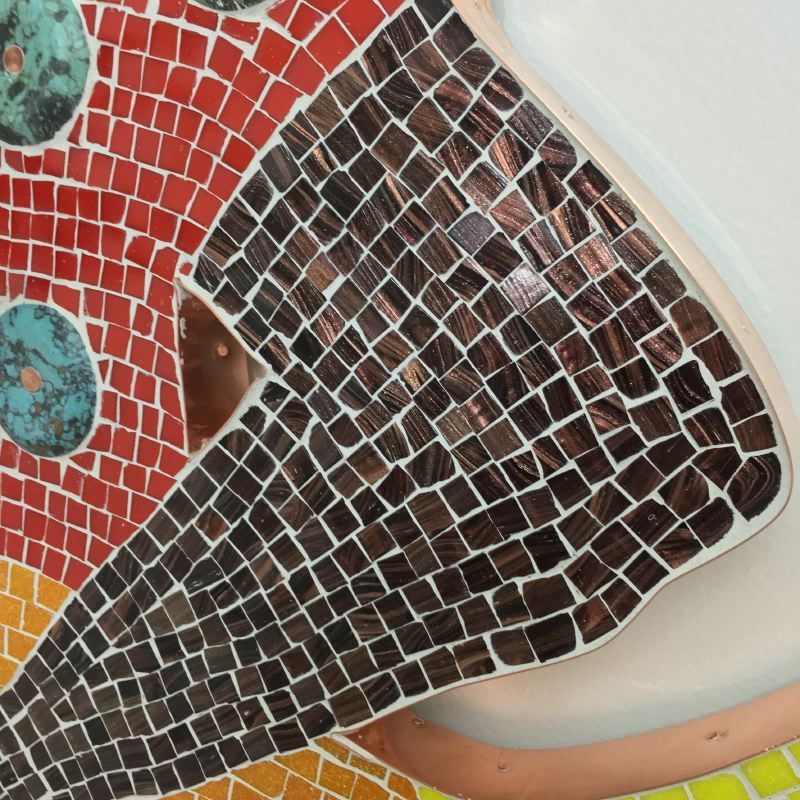
Here, the tail has been finished and the copper has been nailed to the edges of the mosaic (including the inside cutouts by her elbows). This photo also shows the process of laying out small bits of each color of glass to make sure I like how they play off of each other and the caps.
The circles or silver caps on the tail are nailed on above the blue caps with longer nails. This is the same technique I used for the stars on Old Glory. It would have been nearly impossible to work the silver circles in at the same level while also orienting all the logo/swoops cleanly. But I also wanted to add more texture by raising the circles above the blue. An added bonus was that by doing that, I was able to make the circles very precise without having to overly modify and shape the caps.
All of the nails for the caps are copper plated, which ties in very nicely with the copper edge, the copper nails used later to nails on the stone beads and the hints of red ink in the logos on the caps. The whole piece has a warm glow from all that copper.
Another change I made at this point was giving her silver bottle cap hair instead of the dirty blonde, golden caps I used in La Siren II. The silver hair really plays well off of the silver in the Heineken and Bud Light tail. I also figured it’s been 13 years since I made the first mosaic and maybe La Siren’s hair has silvered in that time.
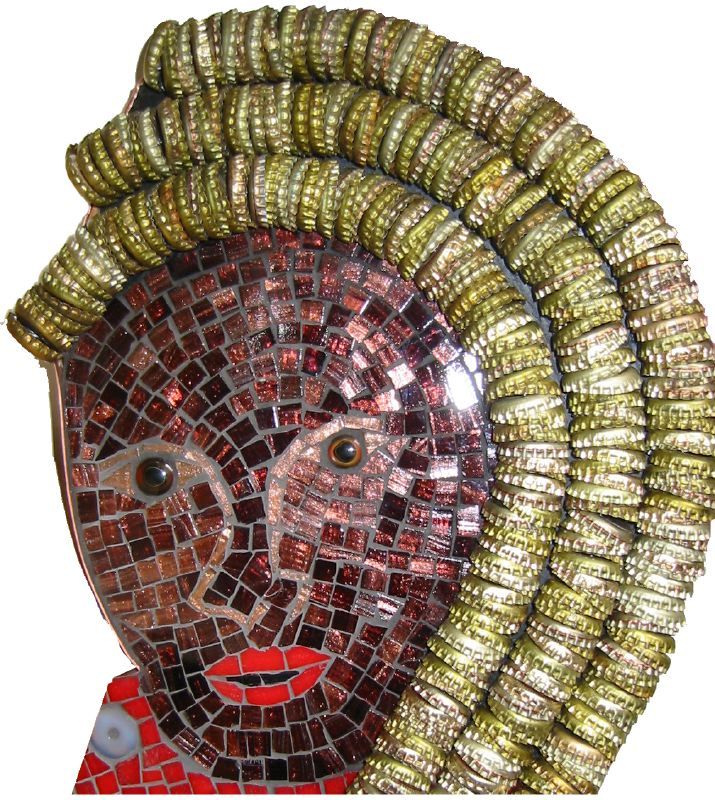
Here’s a detail shot of the face on La Siren II for comparison— When I started the face I wanted to try something different but ended up not going that way.
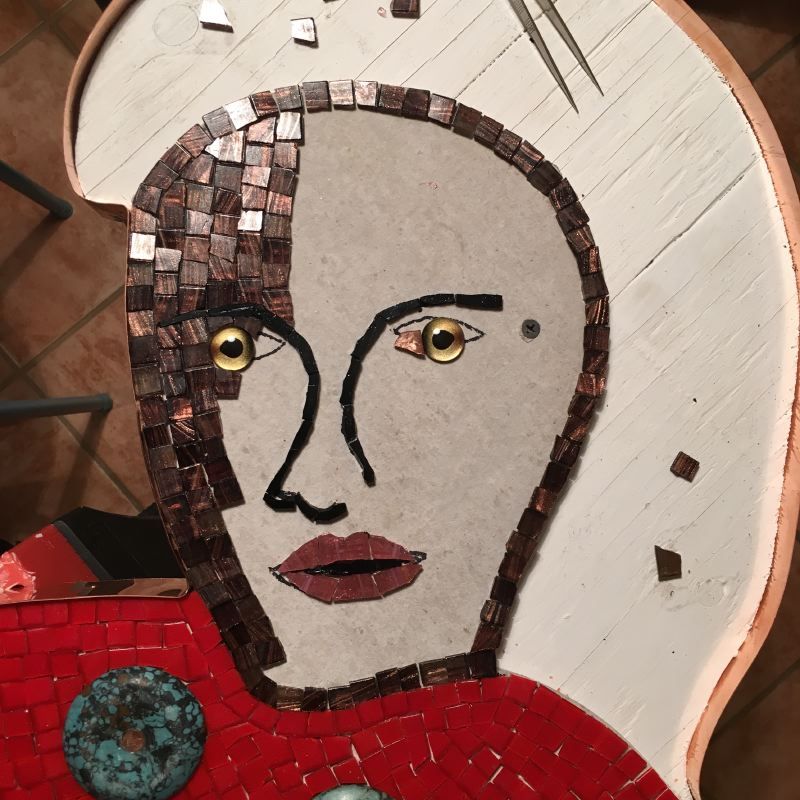
Here’s the first attempt at La Siren III’s face, which I ended up scrapping. There are two differences— one is the black tile used for the lines of her nose and brows. I thought it might pop better than the copper tile I used on the original but instead it totally disappears. The other change was, I thought it might work to do arrange the tiles of the face in a straight field rather than following the circular contour of the face. But I wasn’t happy with that look.
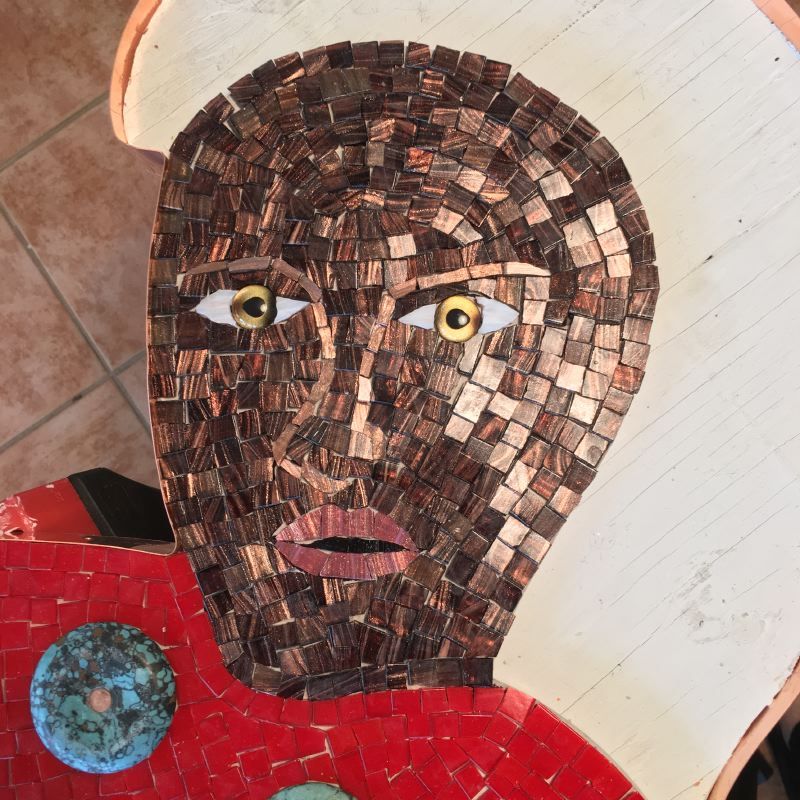
So here is the way I did it after scrapping the first version. The andamento of the tiles (the flow, or the way the tesserae line up) now accentuates the shape of the face as it should. The nose is now light copper glass which is more visible (especially after the mortar and grout).
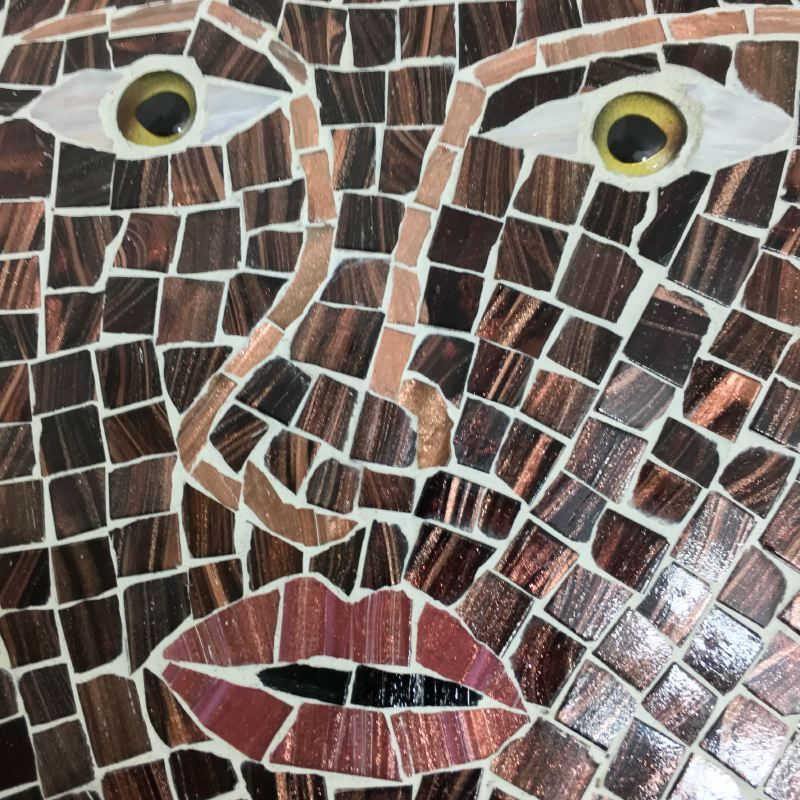
I’m especially proud of how the lips came out! Most of the tile used in this piece is Mosaic Mercantile’s metallic glass tile which I’ve always loved. There’s a grain to this tile both from the copper embedded in the glass and the surface of the tile which is slightly textured. I was careful to orient the grain so that lines of grain are vertical just as lips have a vertical texture to the skin.
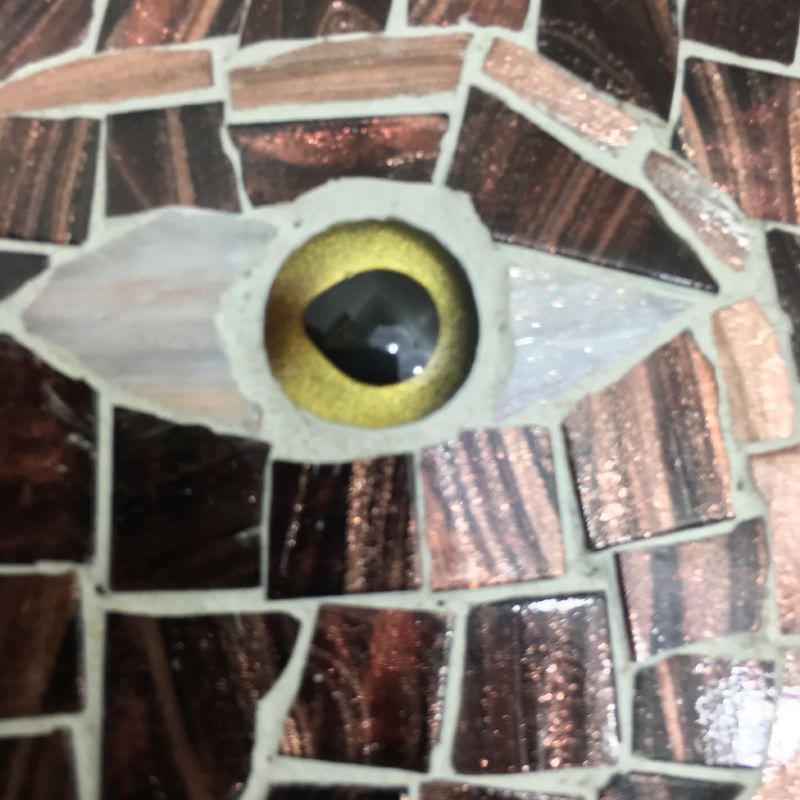
The eyes are glass taxidermy eyes for fish, which feels very appropriate for a mermaid. But they looked wrong and in fact, downright creepy, without the whites of the eye that you’d find on people. The white glass I used also has very slight and subtle copper worked through it which I felt harmonized well with the other metallic skin tones.
Here’s a closeup of the andamento of the arm, aligning the texture of the tile to follow the flow of muscles in the arm.
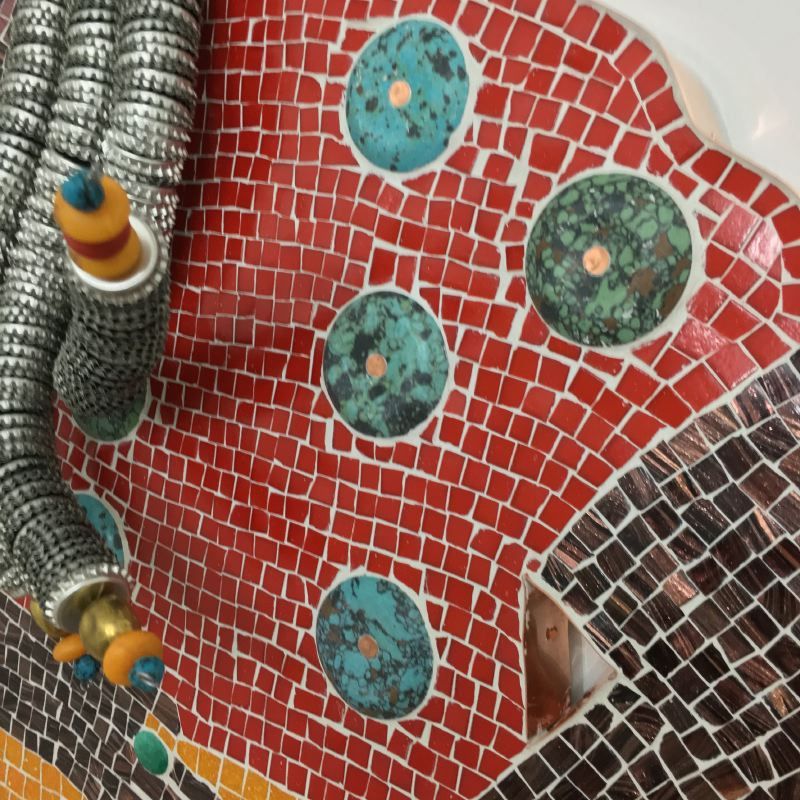
The blue stone beads that decorate La Siren’s shirt are some kind of stone from China. I would dearly love to know what it is as I’d have many uses for it. The beads are nailed to the substrate with heavy 1″ copper boat nails (which are just like roofing nails but solid copper). It is just a bit nerve-wracking to hammer a nail into a stone bead… but then, I have much practice with the surgical application of hammers.
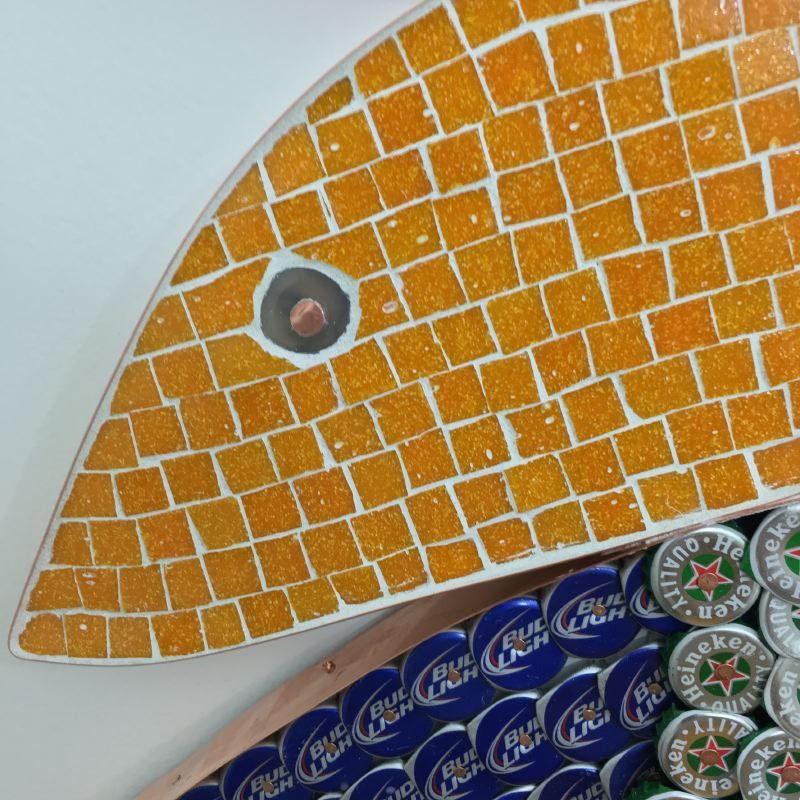
The eye of La Siren’s fish is also stone nailed in place. It’s one of the onyx beads left over from the shirt of La Siren II.
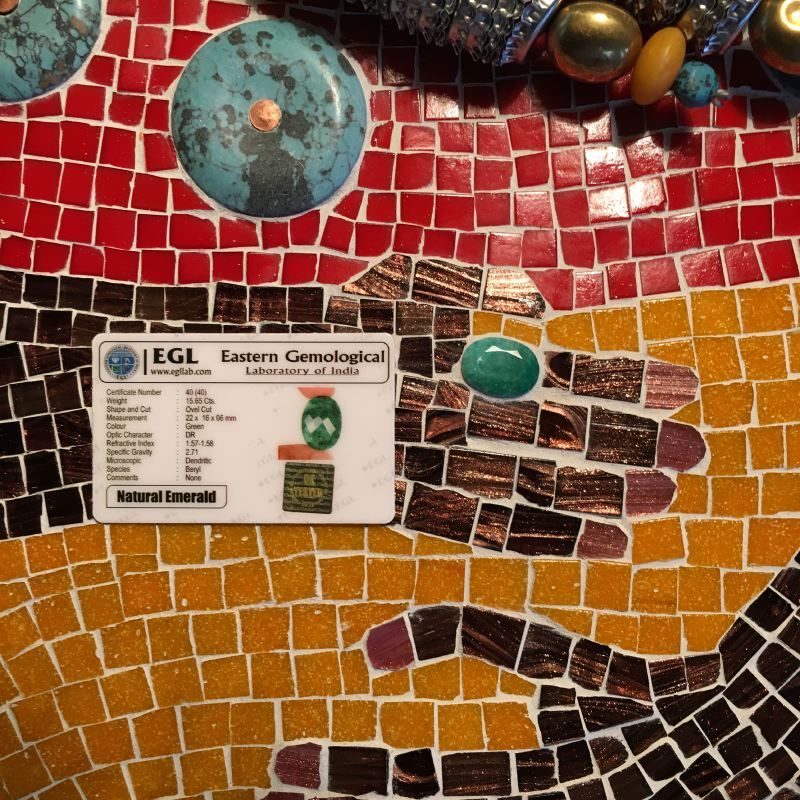
I didn’t plan to incorporate a huge emerald into this piece. It just happened that on the last possible day before I mortared the tile in place, a box of emeralds arrived from India. Marcie had suggested giving her a ring back at the beginning but I didn’t have anything that was right for that. And then I had a 15.65 carat emerald. Boom! Done!
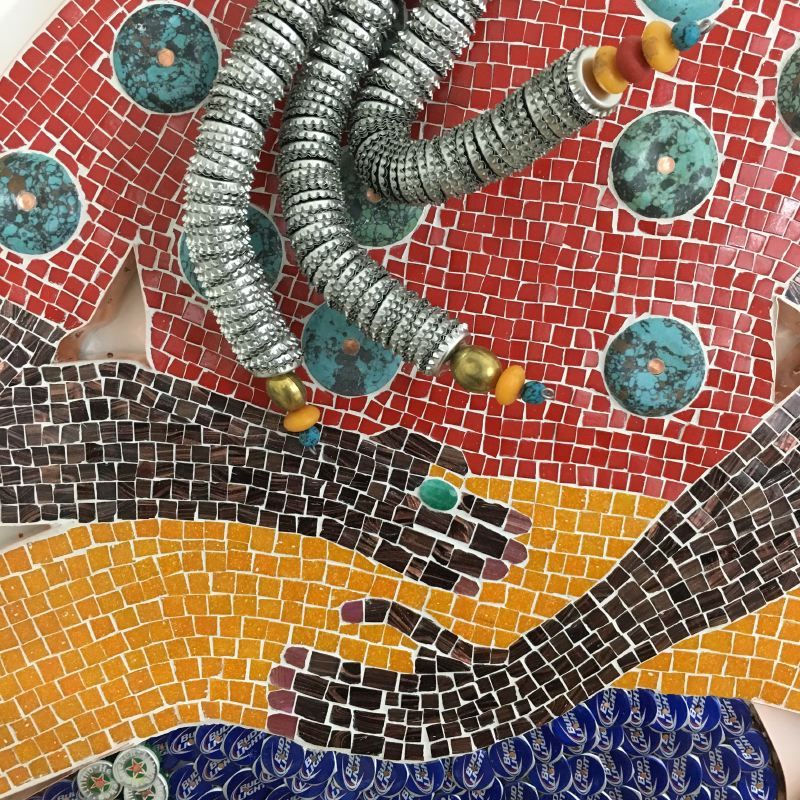
I love this detail photo of her hair! The bottle caps are strung on heavy wire, so the strands can be positioned in any way. I swung them up and out so that they wouldn’t obscure her hands. The beads on the ends of her hair are one part decorative, one part to taper the ends of the hair and hide the last bottle cap.
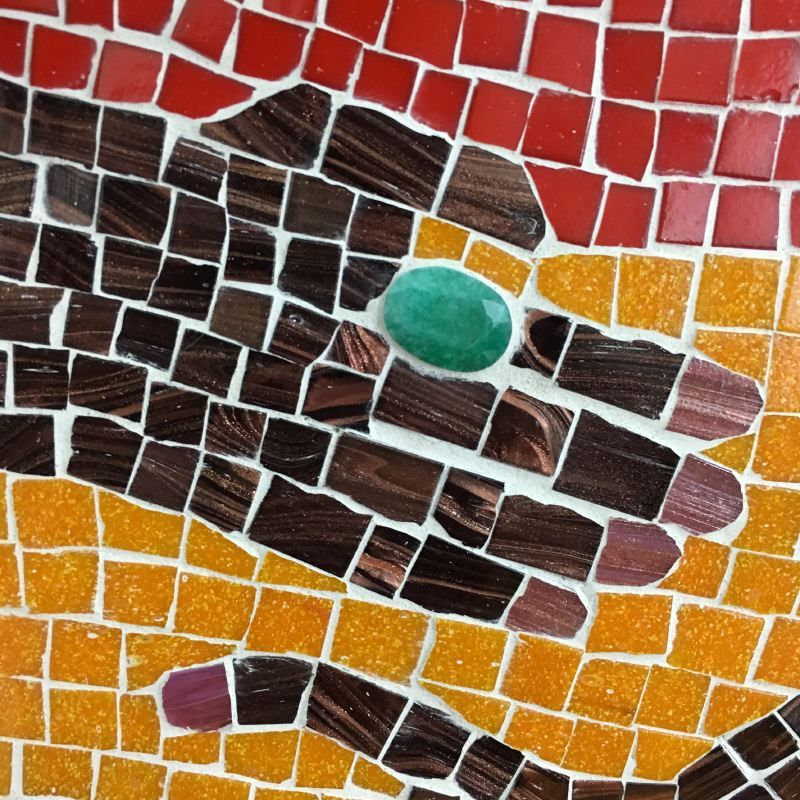
A close up of the fingers and emerald. Note how the fingers are made of longer pieces of tile with short pieces for the knuckles. The pink nails also have copper running through them.
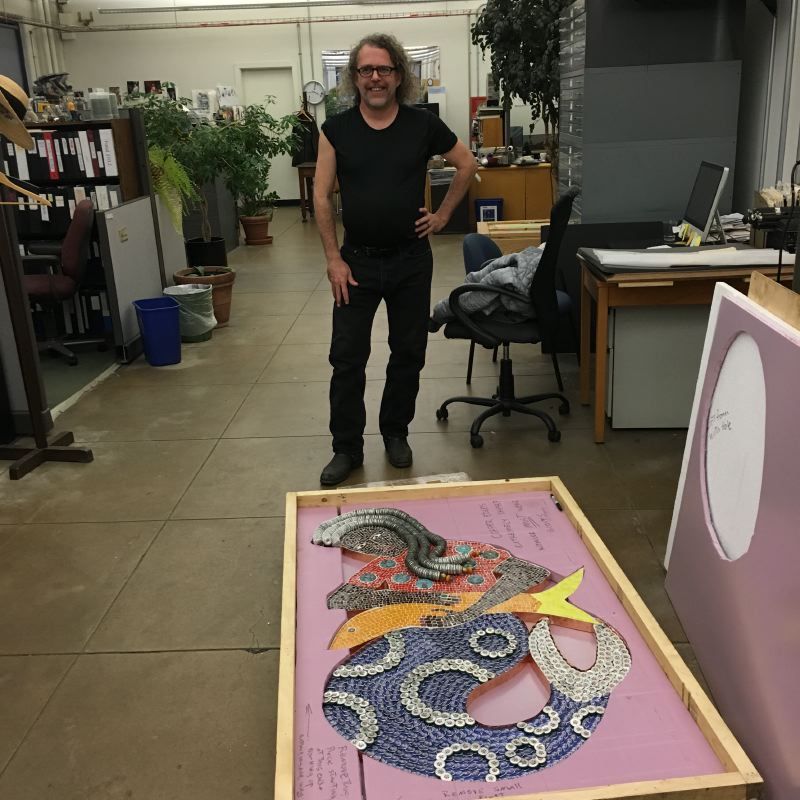
And here I am, backstage at the Exhibit Design Department of the American Museum of Natural History, delivering the finished mosaic! As you might imagine, the Exhibit Design Department is a fascinating place, filled with mock-ups, dioramas, props, relics, artifacts, etc. I loved having the chance to visit behind the scenes. It was kind of like Indiana Jone’s warehouse except most things were not crated up. Even the entrance to the delivery dock was exciting— you drive through several portcullis-like gates to arrive at a parking area which is simultaneously under the museum like a cave, yet open to the sky like a courtyard.
Jacob Smith received the sculpture and gave us a tour. He was pleased with the work and even said that he’d love to have something like that at his home, but my favorite moment was when he complimented the crate I had built. (Actually I gave as much thought to the crate as the artwork knowing how much traveling it would do). I figure if the head of Travel Management for one of the world’s largest museums compliments your crate, well, you have a damn fine crate.
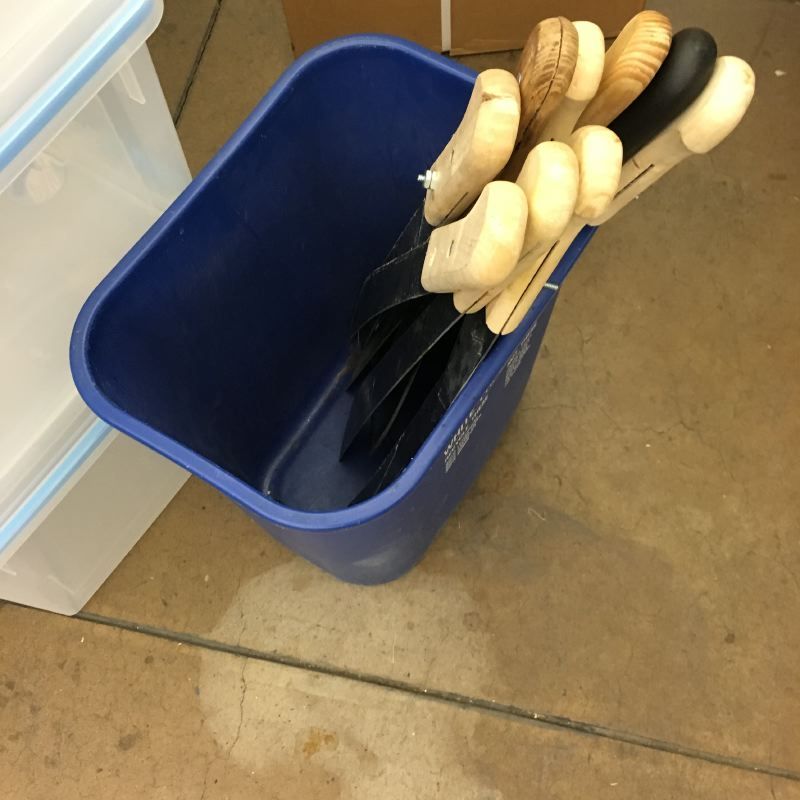
Probably my favorite thing I saw in the Exhibit Design Department was this recycle bin full of machetes. I have no idea what this was for or about but I know where to go in a zombie apocalypse.
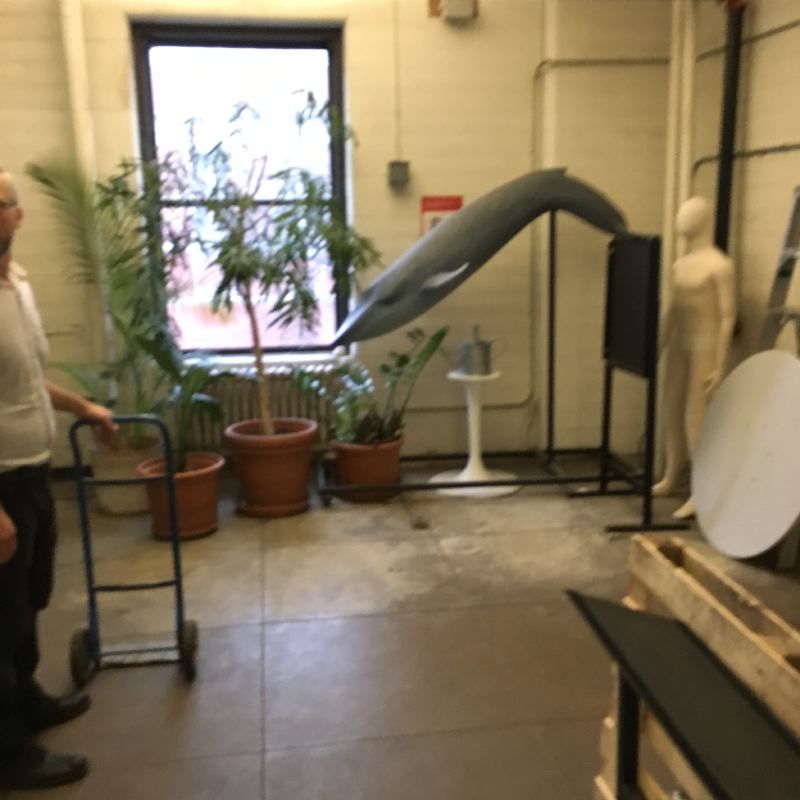
And here is the maquette for the museum’s iconic Blue Whale. The one on display is 94 feet long and 21,000-pounds!
La Siren III will be traveling with the exhibition Mythic Creatures: Dragons, Unicorns & Mermaids for the next five years. If you get a chance to see the exhibit, it’s a great show. If not, consider getting the book that accompanies the show, Mythic creatures: and the impossibly real animals who inspired them. The book is fabulous, full of great paintings, drawings, etchings, sculptures, puppets and more gathered from cultures around the world… and also with fossils and photos of the real animals that inspired these legends.